Frequently Asked Questions

How to run external scripts from the HTTP server?

External scripts are a great way to enhance the HTTP server with specific features. This is supported in the Raspberry Pi Version V2.9.4.0 only, for now.

The external script can be actually any executable, but the most obvious is to run a bash script. Here is an example:

#!/bin/bash
echo "<!DOCTYPE html><html><head>"
echo "</head><body>"
echo "<h2>Hello Script</h2>"
echo "</body></html>"

Place this file into your wwwroot folder name it say “script01″ and make it an executable with the chmod command from the command line:

cd /usr/local/etc/dhcpsrv/wwwroot
chmod +x script01

It is assumed that the HTTP Server function is enabled and reachable by an url such as http://raspberry. To execute script01 and see the resulting page enter http://raspberry/script01 into the address line of your browser and you will see the  Hello Script page. If that is not the case then please check the HTTP server configuration.

In case you don’t want to return HTML code from your script but for example some JSON structure then this can be done as well. This a bash script that returns a JSON structure:

#!/bin/bash
DATA="{\"valid\":true}"
# write to stdout the HTTP response
DATESTRING=$(date "+%a, %d %b %Y %H:%M:%S %Z")
printf "HTTP/1.1 200 OK\r\n"
printf "Date: %s\r\n" "$DATESTRING"
printf "Last-Modified: %s\r\n" "$DATESTRING"
printf "Server: %s\r\n" "dhcpsrv"
printf "Content-Type: %s\r\n" "application/json"
printf "Content-Length: %s\r\n" "${#DATA}"
printf "\r\n"
printf "%s" "$DATA"

As you can see the big difference is that in case of something else than a <!DOCTYPE html>, the full header needs to be included into the output of the bash script. Let’s paste the above into a bash script02 file and make that executable as well with chmod, then your browser will display the JSON output when directed to the url http://raspberry/script02.

The examples so far were HTTP GET use cases. Now let’s take a look at POST requests. POST requests differ from GET requests in extra data supplied from the client app running in the browser. This extra data is usually a list of key/value pairs as they are coming from an HTML form. The DHCP server integrated HTTP function writes that extra data into a temporary file and that filename is supplied as a parameter to the external script. Here is an example on how to deal with that:

#!/bin/bash
saveIFS=$IFS
IFS='=&'

declare -A post

if [ -f "$1" ]; then
 # construct the associative array for POST_STRING
 POST_STRING="$(<"$1")"
 parm=($POST_STRING)
 for ((i=0; i<${#parm[@]}; i+=2))
 do
    post[${parm[i]}]=${parm[i+1]}
 done
fi

IFS=$saveIFS

# do something with the post data e.g. ${post["firstname"]}

printf "HTTP/1.1 301 Moved Permanently\r\n"
printf "Date: %s\r\n" "$DATESTRING"
printf "Last-Modified: %s\r\n" "$DATESTRING"
printf "Server: %s\r\n" "dhcpsrv"
printf "Location: %s\r\n" "post.html"
printf "\r\n"

We see two important things here:

  1. The post data is read from the file supplied as a argument $1 into a param array splitted by ‘=’ and ‘&’. The param array is only there to construct an associative array with the name “post”.   That in turn can be used by the script to perform the required action on that data.
  2. The returning result text from the script is now a redirect header. This is part of the post-redirect-get pattern commonly used together with POST requests. In this case the redirection target is post.html and obviously can be anything else.

We save the above script as “script03″ in the wwwroot folder and call that script from a post request such as in the following example HTML post.html:

<!DOCTYPE html>
<html>
 <head>
 </head>
 <body>
  <form method="post" id="form1">
   <label for="firstname">First name:</label>
   <input id="id_firstname" type="text" name="firstname" p/><br />

   <label for="lastname">Last name:</label>
   <input id="id_lastname" type="text" name="lastname" p/><br />

  </form>
  <button type="submit" form="form1" value="Submit" formaction="script03">Submit</button>
 </body>
</html>

This HTML code presents a form with two entry fields “First name” and “Last name”. Those will show up in the script03 as  ${post[“firstname”]} and ${post[“lastname”]} and can be used to perform whatever that script needs to do.

QUERY data is supported as well, as they are supplied as part of the URL such as “http://raspberry/script04?key1=value1&key2=value2″. An enhanced version of script03 (called script04) can make use of the query data as follows:

#!/bin/bash
saveIFS=$IFS
IFS='=&'

declare -A post
declare -A query

# construct the associative array for QUERY_STRING
parm=($QUERY_STRING)
for ((i=0; i<${#parm[@]}; i+=2))
do
 query[${parm[i]}]=${parm[i+1]}
done

if [ -f "$1" ]; then
 # construct the associative array for POST_STRING
 POST_STRING="$(<"$1")"
 parm=($POST_STRING)
 for ((i=0; i<${#parm[@]}; i+=2))
 do
    post[${parm[i]}]=${parm[i+1]}
 done
fi

IFS=$saveIFS

# do something with the post data e.g. ${post["firstname"]} or ${query["key1"]}

printf "HTTP/1.1 301 Moved Permanently\r\n"
printf "Date: %s\r\n" "$DATESTRING"
printf "Last-Modified: %s\r\n" "$DATESTRING"
printf "Server: %s\r\n" "dhcpsrv"
printf "Location: %s\r\n" "post.html"
printf "\r\n"

The scripts executed this way run with the privilege of the dhcpsrv executable. Usually root privileges in case of systemctl based installation as described here. Handle with care!

 

How to configure DHCP server for redundancy?

The DHCP Server supports the split scope redundancy

Split scope means that you simply run two DHCP servers each with a different IP range. A client asking for an IP address by broadcasting a DHCPDISCOVER message gets two answers. This adds network traffic but is otherwise not creating any trouble. The client will choose one of the answers (mostly the first it got). Once an IP address is assigned then the client will extend the lease by sending the DHCP message by unicast anyway and is therefore only talking to the chosen DHCP server. The client will reinitiate the complete process in case that server is down and does not reply to requests. The beauty of split scope redundancy is, that it only relies on standard DHCP protocol mechanisms. The client will simply get a new IP address from the other DHCP server and will be happy to talk to that server from now on. Another big benefit is that since the two DHCP servers never sync up, they don‘t need to be the same software or software version.

Configuration of server 1:

[Settings]
IPPOOL_1=10.0.0.2-200
IPBIND_1=10.0.0.1
AssociateBindsToPools=1
Trace=1

[GENERAL]
LEASETIME=86400
NODETYPE=8
SUBNETMASK=255.255.254.0

Configuration of server 2:

[Settings]
IPPOOL_1=10.0.1.2-200
IPBIND_1=10.0.1.1
AssociateBindsToPools=1
Trace=1

[GENERAL]
LEASETIME=86400
NODETYPE=8
SUBNETMASK=255.255.254.0

Please note that I have chosen a subnet mask of 255.255.254.0 which allows me to have twice as many IP addresses. The two servers are running on two different computers with the IP addresses 10.0.0.1 and 10.0.1.1, respectively. Each serve different IP ranges: 10.0.0.2-200 and 10.0.1.2-200.

The clients can talk to each other and to both servers with no problem, because they are all on the same subnet 10.0.0.1/23 but get IP addresses assigned depending on which server was chosen.

The only thing that needs to be taken care of is to set DNS_0 and ROUTER_0 dependent on your network infrastructure.

In case DHCP server acts as DNS server as well, then one problem exists. A DNS request reaching server 0 can not be fulfilled with data stored at server 1, and vice versa. Therefore, since V2.9 the SyncServer feature has been introduced. Here is the same example as above with the SyncServer feature enabled:

Configuration of server 1:

[Settings]
IPPOOL_1=10.0.0.2-200
IPBIND_1=10.0.0.1
AssociateBindsToPools=1
Trace=1
SyncServer=10.0.1.1:80

[GENERAL]
LEASETIME=86400
NODETYPE=8
SUBNETMASK=255.255.254.0

[HTTP-SETTINGS]
EnableHTTP=1

Configuration of server 2:

[Settings]
IPPOOL_1=10.0.1.2-200
IPBIND_1=10.0.1.1
AssociateBindsToPools=1
Trace=1
SyncServer=10.0.0.1:80

[GENERAL]
LEASETIME=86400
NODETYPE=8
SUBNETMASK=255.255.254.0

[HTTP-SETTINGS]
EnableHTTP=1

Please note that enabling the HTTP function is essential for this to work, because the sync mechanism simply utilizes the same communication as the status web page.

How to uninstall DHCP server

The DHCP server has no install function and therefore also does not have an uninstall function either. The DHCP server runs as an application without any install, just run it and stop it as you wish.
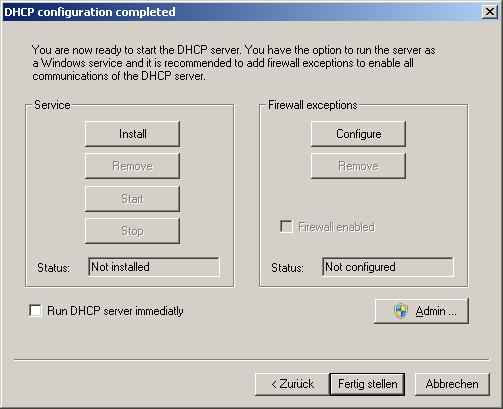
If you are using the DHCP server as a service then you have to remove the service. To remove the service, you can either just hit the stop followed by the remove button or you go into the services applet of windows and remove the service there. Please keep in mind that you need administrator privileges to do so.

dhcpwiz_6
Some people that have used the HTTP function of the DHCP server software, have experienced that the browser shows the DHCP status page even when the software is not running. This is due to the browser and its cache. Please just clean your browser cache in that case.
After you have removed the service and cleaned the browser cache, the DHCP server software is completely removed from your system.

How to exclude clients from IP assignment

Option 1: Exclude with negative (black) list

You can use the IPSCOPE feature, in order to exclude one or more clients from getting an IP address assigned. Assuming you want to exclude just one client with a given MAC address (e.g. 08:00:00:01:03:A1). Here is an example:

[Settings]
IPPOOL_1=10.30.99.2-30
IPBIND_1=10.30.99.1
IPSCOPE_1=if(chaddr == "08:00:00:01:03:A1", null, "validdevice");

AssociateBindsToPools=1
Trace=1
DeleteOnRelease=0
ExpiredLeaseTimeout=3600

[GENERAL]
LEASETIME=86400
NODETYPE=8
SUBNETMASK=255.255.255.0
DNS_0=10.30.99.1
ROUTER_0=10.30.99.1

This will consider all clients but 08:00:00:01:03:A1 to be a “validdevice”. 08:00:00:01:03:A1 is not.

The term validdevice can be used to configure specifics in the scope section for the devices named by IPSCOPE_1. You can follow up on that by reading the IPSCOPE feature description. There is no need to go into details of that now for excluding certain devices from IP address assignment.

If you want to exclude even more devices then just extent the IPSCOPE setting accordingly:

[Settings]
...
IPSCOPE_1=if(chaddr == "08:00:00:01:03:A1" || chaddr == "08:00:00:01:03:A2", null, "validdevice");
...

Now also 08:00:00:01:03:A2 will not get an IP address anymore.
Please be aware that this feature works only, if the client(s) don’t already have a client section in the INI file. Only new clients (unknown to the DHCP server) will be selected based on the IPSCOPE definition.

Option 2: Exclude with positive (white) list

The other way to define which client get an IP address assigned is a white-list approach. Here is an example on how to do that based on the IgnoreUnkownClients setting:

[Settings]
IPPOOL_1=10.30.99.2-30
IPBIND_1=10.30.99.1

AssociateBindsToPools=1
Trace=1
DeleteOnRelease=0
ExpiredLeaseTimeout=3600
IgnoreUnknownClients=1

[GENERAL]
LEASETIME=86400
NODETYPE=8
SUBNETMASK=255.255.255.0
DNS_0=10.30.99.1
ROUTER_0=10.30.99.1

; white-list of clients that get an IP address assigned:
[10-11-12-13-14-15]
[10-11-12-13-14-16]
[10-11-12-13-14-17]
[10-11-12-13-14-18]

Please note that only the four clients listed based on their mac addresses will be served by the DHCP server. The client section does not need to include anything. Simply add more client mac addresses to the list to serve them as well.
The key to this approach is, besides the fact that you need to know the clients beforehand, is to set IgnoreUnkownClients=1. You can add clients to the INI file anytime. And, you can even use wildcards, as described here.

The following example adds all clients 10-11-12-13-14-00 up to 10-11-12-13-14-FF  to the (white) list of clients:

...
[10-11-12-13-14-??]
...

Why does IgnoreUnknownClients not work as expected?

Sometimes there is confusion about IgnoreUnknownClients. There are two settings that control the behavior of the DHCP server with respect to unknown clients: ConfigureUnknownClients and IgnoreUnknownClients. ConfigureUnknownClients controls whether an unknown client gets an entry automatically generated in the INI file based on IPPOOLs and so on. What makes a client a known client is any kind of client section in the INI file. This can be a client section with wildcards. This client section does not need to contain any IPADDR entry. The IPADDR entry is generated automatically. IgnoreUnknownClients controls how the DHCP server behaves in cases in which no client section is generated by the DHCP server. Sent a NAK to the requesting client or simple ignore the request. Example:

[00-40-8C-??-??-??] ; support only clients with mac address starting with 00-40-8C
AutoConfig=1
[Settings]
ConfigureUnknownClients=0
IgnoreUnknownClients=1

This tells the DHCP server to configure only clients with mac address 00-40-8C-??-??-?? and do not respond to any requests from other kind of clients.

Does the DHCP server support more than one ethernet card?

Yes. It automatically uses all NIC’s that it finds and listens for incoming DHCP requests. Windows 2000 (and later OSs) has a little bit of a different behavior than previous Windows operating systems. It doesn’t tell you the IP address of an adapter until it is physically connected. The DHCP server since V1.3 supports that as well by implicitly stopping and starting itself whenever a change in the IP configuration occurs.
You can also restrict the DHCP Server to certain cards by using the IPBIND_x entries in the [Settings] section or server “virtualization”.

I did setup the DHCP server but it doesn’t work. What am I doing wrong?

This is probably the question that I hate the most. Here is what I always do to find out what’s going on: Setup the IP network by hand. In other words: don’t use the DHCP Server, at all. Configure all the necessary things in the network settings of your client machine and don’t set “Obtain an IP address from a DHCP server”. If you have done this and your network still isn’t working there is something very basic wrong, already. There is no hope that the DHCP server is going to help you to solve this problem. Continue reading

What is error 10038? And, why does it occur upon termination of the DHCP Server?

In the trace file (dhcptrc.txt) you will see the follwing trace entries:

[11/07/2012 07:07:07] DHCP Server is terminating (ignore error messages that follow)
[11/07/2012 07:07:07] recvfrom returns with error 10038

This happens every time you terminate the DHCP server. The reason is of technical nature and is by design. There is nothing to worry about, because it is intended behavior.
The reason for it lies in the fact that the DHCP Server software uses blocking sockets as a communication resource. The DHCP Server basically is blocked in a socket call and waits for a request from a client. When you terminate the DHCP Server application, then the blocking socket function call is de-blocked by closing the socket. This then leads to the error message 10038.

Why is the DHCP Status web page not showing?

First, please check that the HTTP Server is enabled.

[HTTP-Settings] 
EnableHTTP=1 
Root="c:\httproot\" ; the server side pathname to the files served through the http protocol

If the HTTP Server is not enabled, then the “Open Status” entry in the context menu is grayed. The status info is provided as a web page and therefore requires the HTTP Server to be enabled.

If it still does not work, then make sure that the port number 80 is not already used by another HTTP Server running on your computer. You can move the integrated HTTP Server to another port number with the following setting:

[SETTINGS]
...
PORT_80=50555 
...

Now, the url to access the status web page is http://127.0.0.1:50555.